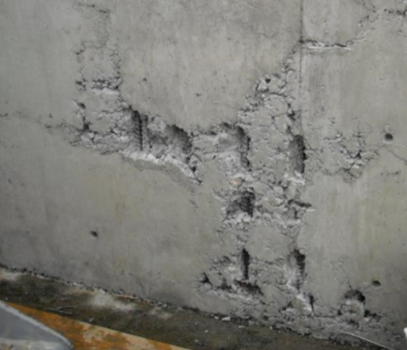
When repairing concrete structures, the following steps must be followed for successful concrete repair:
Step 1 Determine the Causes of Damage
Knowing the cause of the damage makes the repair last longer, if no attempt is made to eliminate the cause of damage the repair will result in wasted effort and money.
There are many possible causes of concrete damage that can be classified as follows:
One-event cause and continuity/recurring course
The cause could be one event, such as flooding; remediation of the cause of damage does not need to be addressed, however; the more common cause is continuing or recurring, remediation must be addressed. For example, the repair methods and material must be resistant to predictable future damage.
More than one cause of damage
Sometimes it is common to find multiple causes of damage such as older design standards, low-quality Materials, and poor construction that reduced concrete durability.
Step 2 Valuate the Extent of Damage
The second step is to determine how much concrete has been damaged and how the damage will affect the serviceability of the concrete, we should ask the following questions:
How much? The amount of damage
How long? The period of the damage lasted
How wide and deep?
How much of the structure is involved? The extent of the damage within the structure.
How quickly the damage may increase?
How much will be the impact of the damage?
How to estimate the extent of the damage? it is by sounding the damage in the surrounding area, one way is to use the hammer for that, Schmidt hammer is one of the NDT (Nondestructive Test) methods of concrete strengths.
Ultrasonic pulse velocity measures the time required for a sound wave to travel through the concrete section, that will help identifying the integrity of concrete and the presence of cracks.
Without confirmation from coring, the results can be misleading, coring can be used to detect subsurface deterioration strength properties, you may perform the petrographic exam that will determine the specific cause of deterioration.
The areas of deteriorated or damaged concrete discovered by these methods (or other methods) should be mapped all marks on the drawing.
It is always a good idea to increase the computed quantity estimate by 15 to 25% to cover the overruns
Step 3 Evaluate the Need for Repair
Not all damaged concrete requires an immediate repair, many factors need to be considered before the decision to perform if repairs can be made.
Obviously, the repair is required if the damage affects the safety or the safe operation of the structure.
Most concrete damage progresses slowly, and several options are usually available if the deterioration is detected early. With early detection, it may be possible to arrest the rate of deterioration using maintenance procedures. Even if the repair is required, early detection of damage will allow better decision.
Step 4 Select the Repair Method and Material
Once the three steps are completed, the obtained information will usually determine what type of repair and which of the standard repair material should be used.
Selecting a repair material and method that may lead to subsequent damage or accelerate damage to the existing concrete or reinforcing steel must be avoided.
There are different types of repair according to the thickness of damage:
· Sealers and coatings: which can be used to protect concrete and to repair surface damage and small cracks (used frequently for maintenance)
· Thin repairs: which can be used when the damage is less than 50 mm thick and do not encompass any reinforcing steel
· Thick repairs: which typically extend behind at least one layer of reinforcing steel or are at about 150 mm thick.

Step 5 Prepare the Existing Concrete for Repair
Preparing the existing concrete for repair is very important for accomplishing a durable repair. This step involves the removal of all deteriorated and damaged concrete and leaving a sound surface for the repair material to bond to.
It is essential that all the unsound or deteriorated concrete be removed before repair materials are applied.
If more than one-third of the circumference of steel is exposed, the concrete should be excavated completely from around the steel. The depth of excavation under reinforcing steel should be at least equal to the maximum size of the aggregate plus 6 mm or at least 25 mm whichever greater.
If the steel is corroded, it should be completely exposed and all surrounding concrete is removed, the bar should be exposed to the point where the concrete is well bonded to the steel and the steel is not affected by the corrosion; when the reinforcing steel is exposed all loose scale, rust and concrete must be removed.
If the corrosion has reduced the steel cross-section to less than 80% of its original diameter, a structural analysis may be needed. If the remaining steel is deemed inadequate the affected bar should be removed and replaced.
For cementitious repair, always keep the surface in SSD (Saturated Surface Dry) condition by soaking the area 2 to 24 hours prior to the application. For non-cementitious material, different surface moisture condition is usually required, some materials require that the surface be dry, while others can tolerate some surface moisture.
Step 6 Apply the Repair Methods
According to the repair material used, each material has unique requirements for successful application.
Step 7 Cure the Repair Properly
Some systems require extensive and water curing, others require water curing followed by drying and some systems require protection with no water exposure until they are hardened.
It is common to find that the curing step has been shortened or eliminated entirely, proper curing is critical to long term repair material performance.
